欢迎访问我的个人博客转发请注明出处:http://www.wensibo.top/2017/03/08/写一个小便签/
一直想要写一个便签应用,因为我一直在用的是锤子便签和一加便签,觉得体验还是可以的,但是始终觉得自己也是可以做的,这段时间因为有些事情耽误了,项目前几天做好了,一直没有时间上传到github (各位大爷路过给个star呗😉) ,今天趁着有时间顺便写了这篇文章,介绍一下写这个便签时遇到的一些问题,当作是跟大家一起分享吧!
功能
- 实现最基本的增加、删除、修改便签
- 便签能够保存到本地
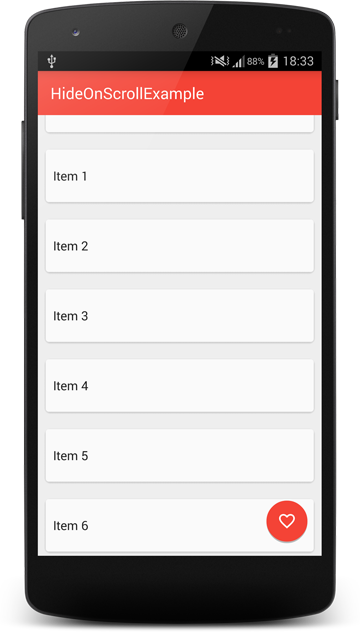
- 主界面采用Material Design设计风格,相对美观(勿喷)
- RecyclerView上下滑动可以自动隐藏Toolbar,以及Floating Action Button
- RecyclerView的Item可以实现如QQ的侧滑效果,可以通过点击删除、置顶进行编辑
- 可以设置便签为星✨,那么将会在便签界面左边增加一个红色的标志,以提醒用户此便签为重要便签
- 变迁主界面标有时间,并且按照编辑时间从新到旧进行排列
效果

Talk is cheap,show me your code
如何在RecyclerView中使用本地Sqlite数据库数据
RecyclerView是google在推出Material Design时着重介绍的一个组件,它对传统的ListView已经可以说是完全代替了,功能强大是他的一个最大优点,但是有一点局限的就是我们自定义的RecyclerView必须继承重写 RecyclerView.Adapter 和 RecyclerView.ViewHolder,虽然在里面我们可以随意重写方法,但是可以发现如果我们使用数据库作为数据源,RecyclerView.Adapter是无法支持读取Cursor的,但是开源的力量又再次显现了,直接给上github地址,但是我们这里只需要复用其中的两个文件就行了,容我娓娓道来。
1、添加下面的RecyclerViewCursorAdapter 和 CursorFilter到工程中
由于代码太长影响排版,我就直接附上下载链接
RecyclerViewCursorAdapter
CursorFilter
2、新建自定义的Adapter并且继承RecyclerViewCursorAdapter
- NoteAdapter
1 | public class NoteAdapter extends RecyclerViewCursorAdapter<NoteAdapter.MyNoteViewHolder> { |
3、在Activity中这样用1
2
3
4
5
6
7
8
9
10
11
12
13
14
15
16
17
18
19
20
21
22
23
24
25
26
27
28
29
30
31
32
33
34
35
36
37
38mRecyclerView = (RecyclerView) findViewById(R.id.recycle_notes);
mRecyclerView.setLayoutManager(new LinearLayoutManager(this));
mCursor = mNoteDbAdapter.fetchAllNotes();
mNoteAdapter = new NoteAdapter(this, mCursor, 0);
Log.d(TAG, "mCursor的大小为:" + mCursor.getCount());
//设置点击事件
mNoteAdapter.setRecyclerViewOnItemClickListener(new NoteAdapter.RecyclerViewOnItemClickListener() {
public void onItemClickListener(View view, int position) {
if (mCursor == null || mCursor.isClosed()) {
if (mCursor == null) {
Log.d("NoteActivity", "newCursor is null");
Toast.makeText(NoteActivity.this, "newCursor is null", Toast.LENGTH_SHORT).show();
} else if (mCursor.isClosed()){
Log.d("NoteActivity", "newCursor is closed");
Toast.makeText(NoteActivity.this, "newCursor is null", Toast.LENGTH_SHORT).show();
}
} else {
mCursor.moveToPosition(position);
String content = mCursor.getString(mCursor.getColumnIndex(NoteDbAdapter.COL_CONTENT));
int importtant = mCursor.getInt(mCursor.getColumnIndex(NoteDbAdapter.COL_IMPORTANT));
int id = mCursor.getInt(mCursor.getColumnIndex(NoteDbAdapter.COL_ID));
Log.d("NoteActivity", content + importtant);
Note clickNote = new Note(id, content, importtant);
Intent intent = new Intent();
intent.setClass(NoteActivity.this, NoteContentActivity.class);
Bundle bundle = new Bundle();
bundle.putSerializable("note", clickNote);
intent.putExtras(bundle);
startActivity(intent);
}
}
});
//设置适配器
mRecyclerView.setAdapter(mNoteAdapter);
如何在RecyclerView上下滑动时隐藏Toolbar和FAB按钮
思路很简单,只需要记录RecyclerView向下滑动(手指向上滑动)时移动的距离,超过一定范围时就会调用Toolbar以及Floating Action Button的animate().translationY方法,令其在Y轴方向上移动,当RecyclerView向上滑动(手指向下滑动)时又会反过来回到初始状态,并且当滑动到RecyclerView底部时会强制Toolbar和FAB回到初始状态,上代码。
- HidingScrollListener
1 | public abstract class HidingScrollListener extends RecyclerView.OnScrollListener { |
在Avtivity中使用回掉方法1
2
3
4
5
6
7
8
9
10
11
12
13
14
15
16
17
18
19
20
21
22
23
24
25
26//为recycleview设置滚动监听器
mRecyclerView.setOnScrollListener(new HidingScrollListener(mCursor.getCount()) {
public void onHide() {
hideView();
}
public void onShow() {
showView();
}
});
private void hideView() {
mToolbar.animate().translationY(
-mToolbar.getHeight()).setInterpolator(new AccelerateInterpolator(2));
FrameLayout.LayoutParams ip = (FrameLayout.LayoutParams) mFloatingActionButton.getLayoutParams();
int fabButtonMargin = ip.bottomMargin;
mFloatingActionButton.animate().translationY(
mFloatingActionButton.getHeight() + fabButtonMargin).setInterpolator(new AccelerateInterpolator(2)).start();
}
private void showView() {
mToolbar.animate().translationY(0).setInterpolator(new DecelerateInterpolator(2));
mFloatingActionButton.animate().translationY(0).setInterpolator(new DecelerateInterpolator(2)).start();
}
特别注意布局文件
如果你发现你运行的效果像下面的截图一样的话,那你肯定是因为布局文件上少写了这两句1
2android:clipToPadding="false"
android:paddingTop="?attr/actionBarSize"
完整的布局代码如下:
- main_activity.xml
1 |
|
最后来讲讲如何实现仿QQ的侧滑出现删除、指定操作
首先得谢谢张旭童 ,他的一个库帮我解决了这个问题,点击这里可以访问他的项目。
1、在布局文件中使用com.mcxtzhang.swipemenulib.SwipeMenuLayout布局,在ItemView后添加button表示删除置顶按钮。
2、在Adapter中设置打开侧滑菜单,并且可以设置菜单在左还是在右1
((SwipeMenuLayout) holder.root.findViewById(R.id.swipeMenuLayout)).setIos(false).setLeftSwipe(false).setSwipeEnable(true);
3、在Activity中设置动作事件1
2
3
4
5
6
7
8
9
10
11
12
13
14
15
16
17
18
19
20
21
22
23mNoteAdapter.setOnSwipeListener(new NoteAdapter.onSwipeListener() {
public void onDel(int pos) {
Toast.makeText(NoteActivity.this, "点击了第" + (pos+1) + "条item的删除按钮", Toast.LENGTH_SHORT).show();
mCursor.moveToPosition(pos);
int id = mCursor.getInt(mCursor.getColumnIndex(NoteDbAdapter.COL_ID));
mNoteDbAdapter.deleteNoteById(id);
mCursor = mNoteDbAdapter.fetchAllNotes();
mNoteAdapter.changeCursor(mCursor);
}
public void onTop(int pos) {
Toast.makeText(NoteActivity.this, "点击了第" + (pos+1) + "条item的Top按钮", Toast.LENGTH_SHORT).show();
mCursor.moveToPosition(pos);
int id = mCursor.getInt(mCursor.getColumnIndex(NoteDbAdapter.COL_ID));
Note editNote = mNoteDbAdapter.fetchNoteById(id);
editNote.setDateTime(DateUtil.formatDateTime());
mNoteDbAdapter.updateNote(editNote);
mCursor = mNoteDbAdapter.fetchAllNotes();
mNoteAdapter.changeCursor(mCursor);
}
});
大功告成,如果想要看详细代码,或者有什么建议可以到Github上给我发Issue或者直接在站内给我留言哦,记得star哦